Improve Docker ElasticSearch nodes
To improve the docker ElasticSearch cluster I have posted here ElasticSearch cluster with Docker we can add memory improvements and monitoring.
Memory
It is recommend by ElasticSearch to disable any swap memory, since the docker for ElasticSearch is based on Ubuntu swap can be enabled inside the docker. To disable this add the following parameter in Docker run;
--memory-swap=-1
Next to disabling the swap memory we can increase the ElasticSearch memory, default is 1GB but with this paramater (again in docker run) you can increase to your own value;
-e ES_HEAP_SIZE=8g
Limit the memory usage from the docker to prevent exhausting;
-m 16g
Make sure you double the amount of memory available on the amount of memory available for ElasticSearch. You can read more about this here: https://www.elastic.co/guide/en/elasticsearch/guide/current/heap-sizing.html
Monitoring
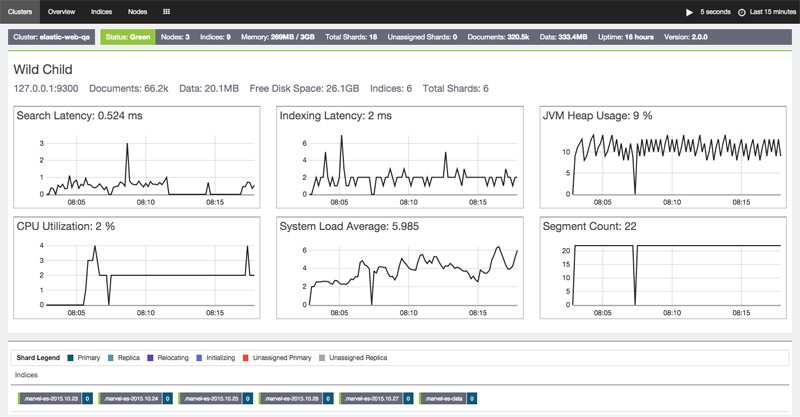
There are different tools to monitor your cluster. If you use Kibana already it’s easy to install Marvel. Marvel is installed by an agent on every ElasticSearch node and the Application on Kibana. In my case we run Kibana in an docker and open it with the following command:
docker exec -it {docker_name_kibana} /bin/bash
Replace {docker_name_kibana} with the Docker name you gave to the Kibana. When you’re inside the docker the following command install the Marvel application:
bin/kibana plugin --install elasticsearch/marvel/latest
Exit the docker command en restart the Kibana docker to make the installation complete.
Install Marvel Agent
On every ElasticSearch (docker) node we need to install the Marvel agent to forward the data. Since we have ElasticSearch in docker we can open it with the following command;
docker exec -it {docker_name_elasticnode}/bin/bash
Replace {docker_name_elasticnode} with the Docker name from the ElasticSearch node(s). Once you’re inside the docker you can execute the following commands to accept the license agreement and install Marvel Agent:
bin/plugin install license
bin/plugin install marvel-agent
Exit the docker command screen and restart your ElasticSearch node docker (docker restart) to make the change work. When you open the Marvel app you would see data come in after an few minutes.
ElasticSearch docker node name
Once I finished the Marvel installation I found out my ElasticSearch node names where random generated. This makes identifying the right node name difficult. To add an custom ElasticSearch node name in your docker you need an extra parameter in the docker run command:
--node.name=elastic_node1
As an improvement on the previous ElasticSearch docker run command the complete command looks like this:
sudo docker run -d \
--name=elastic_node1 \
--net=clusternetwork \
--memory-swap=-1 \
-m 16g \
-p 9200:9200 \
-p 9300:9300 \
-e ES_HEAP_SIZE=8g \
elasticsearch \
--cluster.name=elastic_cluster01 \
--node.name=elastic_node1 \
--discovery.zen.ping.multicast.enabled=false \
--discovery.zen.ping.unicast.hosts="192.168.20.2:9300" \
--discovery.zen.ping.unicast.hosts=\
--discovery.zen.ping.timeout=3s \
--discovery.zen.minimum_master_nodes=1
Don’t forget to re-run the Marvel agent installation when you create an new ElasticSearch node in Docker.