WordPress on IIS Webserver
WordPress is a popular CMS system to use for blogs and other websites. Not every system administrator has knowledge on Linux systems so for some it’s handy to have the WordPress PHP and MySQL installed under Microsoft Windows Server with IIS.
One of the options to fast install WordPress with an MySQL database is with the Web Platform Installer which can be downloaded here:
https://www.microsoft.com/web/downloads/platform.aspx
Another option is to install it manual, as I will describe in this post.
Pre installation
Make sure you’ve installed Windows Server 2008 R2 or higher. On Windows Server 2008 R2 install the features;
Web Server (IIS)
Web Server
Common HTTP Features
Default Document
Directory Browsing
HTTP Errors
Static Content
HTTP Redirection
Health and Diagnostics
HTTP Logging
Logging Tools
Request Monitor
Performance
Static Content Compression
Security
Request Filtering
IP and Domain Restrictions
Application Development
CGI
Management Tools
IIS Management Console
IIS Management Scripts and Tools
With Windows Server 2012 R2 you can use the PowerShell to install features:
Install-WindowsFeature -Name Web-Server,Web-WebServer,Web-Common-Http,Web-Default-Doc,Web-Dir-Browsing,Web-Http-Errors,Web-Static-Content,Web-Http-Redirect,Web-Health,Web-Http-Logging,Web-Log-Libraries,Web-Request-Monitor,Web-Performance,Web-Stat-Compression,Web-Security,Web-Filtering,Web-IP-Security,Web-App-Dev,Web-CGI,Web-Mgmt-Tools,Web-Mgmt-Console,Web-Scripting-Tools
Now Windows Server and IIS is setup we can continue to install PHP and MySQL.
Additional for WordPress there are URL Rewrite rules defined, we need the URL Rewrite module for IIS to be installed. Download can be done by the Web Platform Installer and search for “URL Rewrite” or download this here http://www.iis.net/downloads/microsoft/url-rewrite.
PHP and MySQL
Download the latest version from php.net , you can use the direct link http://windows.php.net/download to download the latest version. Download the ZIP file with PHP Non Thread Safe version, you can choose a x86 and x64 (64-bit) version. We also need the Redistributable for Visual Studio package, the version that we need is defined in the PHP zip package name. See an overview here:
- The VC9 builds require you to have the Visual C++ Redistributable for Visual Studio 2008 SP1 x86 or x64 installed
- The VC11 builds require to have the Visual C++ Redistributable for Visual Studio 2012 x86 or x64 installed
- The VC14 builds require to have the Visual C++ Redistributable for Visual Studio 2015 x86 or x64 installed
Since Windows Server 2012 R2 is 64-bit I will advise to install both 64-bit PHP and Redistributable for Visual Studio.
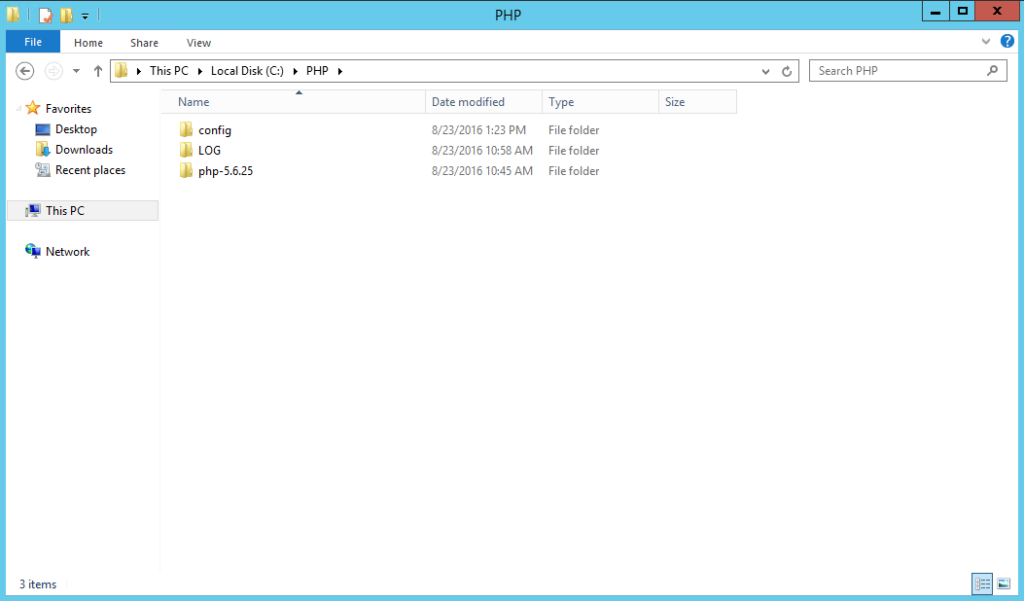
- Create a new directory C:\PHP.
- Unzip the PHP ZIP folder to C:\PHP\PHP-{version} where the version of PHP is in the directory name. With the version defined you can swap later easy between newer versions.
- Create a new directory C:\PHP\config and copy the php.ini file here.
- Create a new directory C:\PHP\LOG which can be used to store the error log. So the directory structure can look like this.
- Install Redistributable for Visual Studio by running the MSI package.
Download the latest MySQL community edition server for Microsoft Windows from the following location : https://dev.mysql.com/downloads/mysql Run the MSI installer with the following options during installation:
Choose config type : Server Machine
Connectivity the TCP/IP on port 3306 (default).
Set an strong root password. (and save this somewhere!)
Configure to run as an service.
Once the installation is finished we have setup an MySQL server and have PHP ready.
Configure PHP in IIS
Now we have the PHP files copied and IIS installed we have to open the Internet Information Services (IIS) Manager to configure handling of PHP files. We will setup PHP with FastCGI.
- Open the IIS Manager
- Open the Feature View on the server level.
- Double click on FastCGI Settings.
- Click on Add Application… in the right corner under Actions.
- Add the following settings, please specify you own directory (with version) you use:
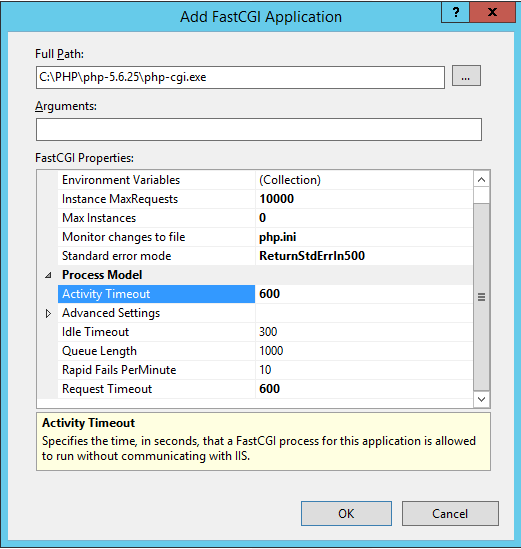
- Also modify the default values for Instance MaxRequests, Max Instances, Monitor changes to file, Activity Timeout and Request Timeout to the settings defined in the image.
- Click on OK to save the settings.
- Go to the IIS Manager server Feature View again.
- Double click the Handler Mappings.
- Click on Add Module Mapping… on the right under Actions.
- Configure an new Module Mapping defined with values in the image:
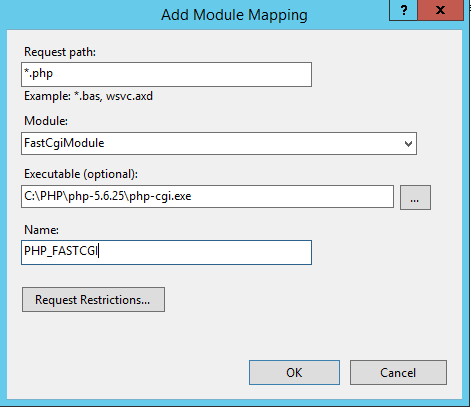
- Click on OK to save.
Now PHP files can be handled by IIS. Just try it out with adding an new file phpinfo.php in the root of the default website:
<?php phpinfo(); ?>
This will give back an overview of your PHP configuration. In another post I will explain the PHP.ini settings to optimize for IIS web server.
Install WordPress
We will install WordPress for this example with the default settings and with the MySQL root user, it’s recommend for production environments to have separate login accounts with only access on database level. You can download the latest version of WordPress here: https://wordpress.org/download/
- Unpack the WordPress files in the root directory of the IIS website, by default this is C:\inetpub\wwwroot\
- Create an web.config file in the root directory of the website and set the rewrite rules. Just copy an paste the xml bellow:
<?xml version="1.0" encoding="UTF-8"?> <configuration> <system.webServer> <rewrite> <rules> <rule name="WordPress Rule 1" stopProcessing="true"> <match url="^index\.php$" ignoreCase="false" /> <action type="None" /> </rule> <rule name="WordPress Rule 2" stopProcessing="true"> <match url="^wp-admin$" ignoreCase="false" /> <action type="Redirect" url="wp-admin/" redirectType="Permanent" /> </rule> <rule name="WordPress Rule 3" stopProcessing="true"> <match url="^" ignoreCase="false" /> <conditions logicalGrouping="MatchAny"> <add input="{REQUEST_FILENAME}" matchType="IsFile" ignoreCase="false" /> <add input="{REQUEST_FILENAME}" matchType="IsDirectory" ignoreCase="false" /> </conditions> <action type="None" /> </rule> <rule name="WordPress Rule 4" stopProcessing="true"> <match url="^(wp-(content|admin|includes).*)" ignoreCase="false" /> <action type="Rewrite" url="{R:1}" /> </rule> <rule name="WordPress Rule 5" stopProcessing="true"> <match url="^([_0-9a-zA-Z-]+/)?(.*\.php)$" ignoreCase="false" /> <action type="Rewrite" url="{R:2}" /> </rule> <rule name="WordPress Rule 6" stopProcessing="true"> <match url="." ignoreCase="false" /> <action type="Rewrite" url="index.php" /> </rule> </rules> </rewrite> </system.webServer> </configuration> - Now you can load the website with http://localhost or remote with the IP number from the server.
- Follow the setup of WordPress and use localhost as MySQL host with the root name and password set in the MySQL installation.
- After the setup WordPress should be up and running.
Configure IIS website write permissions
After WordPress is working you need the setup the following configuration to make sure you can upload media:
- Add write and modify permissions for user account IUSR on the wp-content/upload folder.
- Go to the Feature View on the IIS website, in our case Default Web Site.
- Double click on Authentication.
- Click on the Anonymous Authentication and click on Edit… in the right corner under Actions.
- Configure the identity to Application Pool Identity:
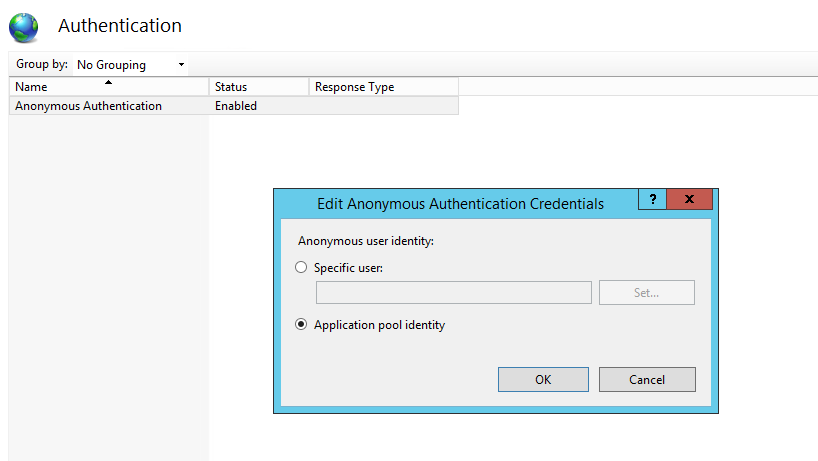
With this last setting you make sure uploaded files have the right permission set. - Click OK to save the settings.
Additinal information: with the group IIS_IUSRS you can give write permissions on for example the wp-content/upload folder and cache folder. Found an article here about this group: http://www.iis.net/learn/get-started/planning-for-security/understanding-built-in-user-and-group-accounts-in-iis
And that is in short how to set-up WordPress in IIS. Give me an comment if you have questions on this,